
V Planner V3 - Lesson Planners
Lesson Planners in V Planner V3
Latest Version - V Planner V4.3V Planner 4.2, High School V Planner V4.2, and Homeschool Lesson Planner V4 are ready for use. Download from the Member's area. ![]()
The Lesson Planners are the worksheets that gather or fetch lesson plans based on your choice of fetching systems - Number System (NS) and Date System (DS). Obviously the lesson planners are an important part of the V Planner and to make the V Planner work well for you it is important to know about the controls on the lesson planners. On this page I will add a screenshot of the controls and describe each one. First I will list the lesson planners.
The Lesson Planners in V3
V Planner V3 has fewer lesson planners than previous V Planners. For V3, I added controls that will allow you to use either fetching system, NS or DS, for not only the entire planner, but for each subject on a subject by subject basis.
List of Planners
-
For Each Student
- Block Planner named Block#, the number being 1, 2, 3, or 4.
- C Planner or Char named C# - a video about the C Planner at: ../v-planner/vp-vid-char-planner.htm" title="How to Use the Char Planner">How to Use the Char Planner
- List Planner named List#
-
For All or Any Student(s)
- ALLBlock
- AU
- Sub-PR - A "Subject" Planner - This planner is based on PR-S and lacks all of the controls that are in the other lesson planners. Using it is like using PR-S.
A teacher's planner is not included in V3, but it is easy to make one. Read how to do that here: Lesson Plan Columns to Planners
Lesson Planner Controls
V Planner V3 has more controls than past V Planners. The same controls are present in the High School V planner. The controls are selection drop-down lists.
List of Controls
 This is the Main System Selection. The choices are Date and Number. This control is typically located at the top. If this selection is paired with Master DS/NS, then this system will control the entire planner. If this selection is paired with Override DS/NS, then this selection will control only the planner dates.
 This selection is also at the top of the planners. The choices are Master DS/NS and Override DS/NS. This selection determines whether or not the main system selection (point 1 above) controls the entire lesson planner or just the dates.
 This selection is only present in the Block# lesson planners. Block planners control the lesson plans in the C# planners and this setting determines whether or not the 6th day is displayed. Show means the 6th day is displayed and Hide means it is not.
-
 This is the Date selection drop-down list. When using the Date System anywhere on the lesson planner, a date must be selected from this list. The drop-down shown in the image above is the "Year#Top" list. That means it will display a few recent dates near the top of the list. If the school year has not startet yet or if it is over, then not dates will be displyed in the special area at "Top".
-
 This selection allows you to choose between the "Top" date list or the regular date list. The Top date list has a few recent dates at the top. The regular list does not have the recent dates; it is simply a long list of school dates from the beginning. The recent dates for the "Top" list are controlled at the Block# planners.
 -
 This control is only present on the Block# lesson planners. If you see it on the ALLBlock planner, ignore it. These controls, the Apart and the Start, determine what dates might appear in the "Top" list.
-
The Apart Setting - This controls the number of days in between each date. Default setting is 5 and that is a good setting for those who usually have a 5-day school week.
-
The Start setting controls the first day of the week for the first "Top" date. Default is Monday, but the setting does not always guarantee that Monday will be shown. If a Monday is not a school date, then it will not be shown.
-
-
Showing and Hiding Lesson Plan Columns

 - On the S-Sheets there are 3 lesson plan columns into which you may enter plans. You may choose to use just one column or all three. There is a video that briefly covers that online at: ../v-planner/vp-vid-col-to-planner.htm">V Planner - How Lesson Plan Columns are Handled in the Planners. At the Lesson Planners, you can choose to show or hide any of the lesson plan columns per subject. The settings are located on the right side in the list planner (pictured left) and on the left side in the Block planners (pictured right). The choices are simply S or H for each column, and for each subject.
 -
 The selection with the choices of Short and Full refer to the class names. Short displays the shortened version of the class name while Full displays the formal class name. This setting exists because sometimes class names are too long to display nicely on the planners.
 -
NS, DS, and Override

 In the same row as each subject is a drop-down list that has the options - NS and DS. This is a lesson plan fetching system for each subject. NS stands for Number System and DS stands for Date System. In order to use the subject by subject lesson plan fetching settings you must also select Override at the top of the lesson planner. In the case of the ALLBlock and AU planner, the Override setting must be selected (or not) for each student. This setting should be a great time saver and it took some creative formulating to make it happen.
 -
Making the Main Lesson Plan Fetching System control the entire lesson planner

If you want the system setting, Date or Number, to control the entire planner, then select the system and select Master DS/NS. -
Override and the Dates
When using override be certain that you do not forget to choose a system for the lesson planner dates. No matter which is selected, Master or Override, the Main System selection will place the planner dates. So- always make a choice at the Main System selection.
- If you choose Date, then select the dates from the dates drop-down.
- If you choose Number, go to the Days worksheet and select the dates with the number system.
AU Planner
The Au Planner is a little different. It lacks the date drop-down list. Instead it will automatically display Today's plans or the nearest school date to today. The date may be adjusted with a number typed in the cell at F1.
The AU planner also wants you to select each child's "weekend." There are two drop-down lists. From each one choose a day of the week which is that child's weekend. If the child has a one day weekend, then choose only one day and leave the other one blank.
C# Planner, Char Planner
The C# Planner, named C1, C2, C3, and C4 is also different. C# gets its lesson plans from the Block# planner and it is important to know that to avoid confusion. The special thing about the C# planner is that it is a fancy list type that allows you to --
- Display lesson plans "in line" or with line breaks
- Add a comment to each subject
- Add an extra check-off area to each group of lesson plans
C Planner Controls
- F2 - insert a Character number (see the char worksheet), it cannot be left blank. This character controls the space in front of your comment that you can type into column D.
- For Each Subject in column D, you can type in a comment.
- For each subject in column E, you can enter a charater from the Char list. This controls the space after each group of lesson plans
- For each subject in column F, you can enter a type of check-off box or leave it blank. This controls the space after each group of lesson plans
Donna Young
Updated
About the V-Planner
 The V Planner is a spreadsheet file in xls and xlsx format. To use the file, you must have Microsoft Excel on your computer. The V Planner is available from YoungMinds web site. YoungMinds is online via a subscription and on Donna Young's Site-CD.
Read about the two different subscriptions available for DonnaYoung.org Some items are available for purchase from the Shopping Cart
Lesson Plan Form - Margins
 1-Page and 2-Page
This is a new form style, the design is "clean" (uncluttered) and the layout utilizes the margins by extending the row lines.
Color Sonic
 A Color Study - Challenge your children to color this drawing of Sonic the Hedgehog™
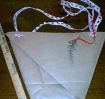
Bear-in-a-bag
 Bear-in-a-Bag Christmas Ornament - Cute little bear head sticking out of a bag.

Copyright © 1999 - 2024 Donna Young, All Rights Reserved
![]() RSS Feed ·
Terms of Use ·
Privacy Policy ·
FAQ's ·
Blog ·
Site Index
RSS Feed ·
Terms of Use ·
Privacy Policy ·
FAQ's ·
Blog ·
Site Index
Subscribe to DonnaYoung.org Update Feed by Email
You are at DonnaYoung.org, online since 1998. Thank you for visiting my website. Donna Young