
Setup Step One - Data
Latest Version - V Planner V4.3V Planner 4.2, High School V Planner V4.2, and Homeschool Lesson Planner V4 are ready for use. Download from the Member's area. ![]()
This step takes place at the Data Worksheet. On this page I will briefly go over which cells need to be filled in. For more information about the Data worksheet, please also read Data.
Your Information and the Personal Calendar
The upper part of the Data worksheet asks for information that will appear on the Transcripts and that information is: the Parent Name, address, school name, and phone number. Filling in this information is optional, however; if it is not filled in, the upper part of the transcripts will be blank. Blank rows may be hidden and the empty space will not appear on the printed copies.
Next fill in your first name or nick-name - it needs to be a short name, not your first and last name, just your first name or your nickname. At “Your Birthday”, enter your birthday - the month and day is enough - like this: 03/16.

Last, enter a date into the cell that is under the words “Calendar Date.” This date is not the school calendar; this date is for the personal calendar which is on a worksheet named Calendar.
Student Information
V Planner supports record keeping for up to four children and from this point on, information is entered for each student.

will go over each point from the image above.
- Enter the first date of school for this child. Each child can have a different school start date. Setting the date for each child is important and will allow you to go to Step 2 in the setup.
- Enter the grade that the child is in or the closest approximation. The grade appears on the report (RC1), the COS (Course of Study), the transcript, PR-S (print any s-sheet) and all of the planners.
- Enter the child’s last name. As noted on the sheet, this appears on the transcript and it will also appear on the COS.
- Enter the child’s first name.
- The child’s birthday is next. The birth date appears on the transcripts.
- And last is the title for this child’s planners.
Setting the Number of Grading Terms
For each child, you will use a drop-down list to determine how many grading terms the child will have and which grading term begins each child’s second semester. This setting affects the calculations that are made by the Term Grade Calculators - basically how often grades are averaged and how often attendance is totaled.

Some possible setups -
- When I homeschooled, we had two grading terms and so the setting for us would be 2, 2.
- If you need grades and attendance to be counted quarterly then the setting would be 4, 3.
- “4? to activate four Term Grade Calculators
- “3? to set which term starts the second semester
Shown in parenthesis- How terms will be assigned to the Term Grade Calculators in this setup:
(first semester- term 1, term 2); (second semester- term 3, term 4) - If you need grades and attendance to be counted 6 times during the school year then the setting would be 6, 4 (1,2,3), (4,5,6)
An asymmetrical example - a class extended -
The settings do not have to be symmetrical. In the example shown in the image above, the setting is 5, 3. This setting means that out of the 5 grading terms - 2 grading terms are set for the first semester and 3 grading terms are set for the second semester.
(1,2), (3,4,5)
Use for this asymmetrical setting - So that the student could study one subject longer. The setting affected all of that student’s classes, however; the fifth term was ignored in the classes in which the fifth term was not needed.
Changing the grade term settings mid-year -
The number of grading terms may be changed during the school year, however; if they are changed you will also have to go to the Terms worksheet and adjust the dates there as well. In the instance of extending a school year for a child, be sure to first go the the Days worksheet and “x” the extra school dates before making adjustments at the Terms worksheet.
Will This Student Earn Credits?
This is the last question for this child’s setup and I have not yet discussed all of the previous settings. I bring it up now because this setting is important and it impacts the Classes setup, and I do not want you to waste time entering credits in the Classes setup when they are not needed. This setting enables the part of the grading system that will calculate GPA (grade point average.) GPA is something that is typically used in high school. If your child is in high school, then I recommend that you use the High School V Planner, but if you do not want to do that, then adjust this setting as needed.

Two Points -
- If this is set to “Yes” then you will have to enter credits in the column marked “Credits” when setting up the list of classes.
- If this is set to “No” then do not enter credits in the column marked “Credits” when setting up the list of classes.
The List of Classes - The First Six S-Sheets
Setup for the first six S-Sheets is straightforward. Setup assumes that classes for the first 6 s-sheets will be standard, meaning, one class per S-Sheet. Each class uses one row. The S-Sheet links are in the left column, S#. The class information in the same row as the S# link will be the class information for that particular S-Sheet.
The headings pictured in the image below and with a brief explanation-
- Formal Class Names - this is for the class names such as History, English, etc. Enter the student’s classes in this column, one class per row.
- Credits - if the student is using credits, enter the credit that will be earned for each class.
- 1 or 2 Main Books - Use punctuation - enter the primary books that will be used. Keep in mind that these books will be displayed on the S-Sheets. Use punctuation means that you should type a comma or a semi-colon between the book titles. The punctuation is displayed with the series of book titles in the Course of Study sheet (COS). You cannot enter line breaks.
- Additional books - Use same punctuation - Enter any additional books that are used in the class. Use same punctuation indicates that you should enter the same punctuation in this series of titles that you used in the previous column, either a comma or a semi-colon. As before, do not enter line breaks.
- Short Class Names - If the formal class name is long, then enter a shortened version of the name in this column. At the planners you will have the option of selecting which class name to display (Full or Short).

A Note - Use as many of the first 6 S-Sheets that you need. S-Sheets may be skipped over if you do not need to use all of them.
The List of Classes - The Divided S-Sheets, 7 - 10
S-Sheets 7-10 are The Divided S-Sheets and when you get to setup for S-Sheets 7-10, please notice these differences:
- A Drop-Down list with the choices of: Full; Split; and None
- Two rows (or lines) for classes per S-Sheet
The Settings: Full; Split; and None, and What They Mean
 Full means that you will use the S-Sheet for a full school year and for one class.
Split means that the S-Sheet will be “divided” in some way and I will list examples below
None means that you are not going to use this S-Sheet
The Divided S-Sheets - Using the Split Setting
When you decide to Split an S-Sheet, you can use the Divided S-Sheet for semester classes in the following ways (see also the image to the right)
- For only a first semester class - To do this, select Split and enter the class name and information in the 1st row.
- For only a second semester class - To do this, select Split and enter the class name and information in the 2nd row. See video
- For a first semester class and a second semester class, but each one is a different subject - To do this, select Split and enter the name and information for the 1st semester class in the 1st row and enter the name and information for the 2nd semester class in the 2nd row
Divided S-Sheet Classes on Transcripts and RC1
The classes for the divided s-sheets will have their own selection or space on the Transcripts and RC1. That means that each class is treated as such, a class with its own line in the reports.
Reading Lists
To the right of class setup are three columns into which you may enter up to 63 books. To properly fill this in, first fill in the 1st column, then the 2nd column, and then the 3rd column. The books listed will appear at the bottom of the Course of Study (COS).
A Note: You do not have to use all 3 columns, they only need to be filled in order when using them.
A Tip for using this list states that says -
in unused book areas, type “additional information” for each student to show on COS
That means that if you want to type more information about the child to show on the COS, then use this area to do that. Enter the information after the list of books. Why you should - Although the COS contains open cells for typing, the typed content for each child would have to be removed for each child because the COS is a dynamic report in that it is used for each child but not at the same time. It will be better to type the additional information for each child in the reading list area at Data rather than typing it at COS.
Other Courses
![]() V Planner V3 and the High School V Planner allows you to enter up to two other courses (or classes). This area could be used for classes that do not require an S-Sheet, but require a presence on the Grade Report (RC1) and the Transcripts. To use Other Courses, enter the class names and other information - up to two - in the space provided. Setup and the addition of grade scores and hours for Other Courses is completed at the Other Courses worksheet
V Planner V3 and the High School V Planner allows you to enter up to two other courses (or classes). This area could be used for classes that do not require an S-Sheet, but require a presence on the Grade Report (RC1) and the Transcripts. To use Other Courses, enter the class names and other information - up to two - in the space provided. Setup and the addition of grade scores and hours for Other Courses is completed at the Other Courses worksheet
The Yes/No Questions at Data
- Will you need to record minutes spent in class? Choose Yes or No. This will activate the Time column in the S-Sheets.
- Is the school year completed? Choose Yes when school is over for each child, then enter the date below.
- Enter date that school is completed -> Enter the date that the school year was over for this child. This will activate a message on the transcripts.
- Will this student use Credits? This question was covered on this page many paragraphs above.
This Concludes Step One in Setup for one Child
Before moving to Step Two at the Days worksheet, be certain to complete the setup for each child at Data.
Donna Young
Updated
About the V-Planner
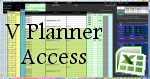 The V Planner is a spreadsheet file in xls and xlsx format. To use the file, you must have Microsoft Excel on your computer. The V Planner is available from YoungMinds web site. YoungMinds is online via a subscription and on Donna Young's Site-CD.
Read about the two different subscriptions available for DonnaYoung.org Some items are available for purchase from the Shopping Cart
Macaroni Turkey
 Macaroni Turkey - an easy project that creates a memento of your child's Hand Tracing
Handwriting by Style - DN
 The 1/2 rule height version of this set "DN" is finished.The letters are similar to D'Nealian.
Linear Perspective Models
 Linear Perspective Models Using the DML DML is short for Diagonal Measuring Line

Copyright © 1999 - 2024 Donna Young, All Rights Reserved
![]() RSS Feed ·
Terms of Use ·
Privacy Policy ·
FAQ's ·
Blog ·
Site Index
RSS Feed ·
Terms of Use ·
Privacy Policy ·
FAQ's ·
Blog ·
Site Index
Subscribe to DonnaYoung.org Update Feed by Email

You are at DonnaYoung.org, online since 1998. Thank you for visiting my website. Donna Young