A Memory3
 A memory cube is a project in which one places 6 photographs on a cube. The cube can be made of wood, but in the case of this particular memory cube, the cube is a piece of card stock paper that has the photos printed on it and then folded into a cube shape. The templates for this project are at Cube Templates. This page describes how one might pre-fold the cube and how to cut the cube.
Pre-Folding the Cube
 See Also: The Gift Michelle Made
Pre-folding is important so please do not skip this step.
 Should you pre-fold all of the lines before or after cutting?
I have tried pre-folding before cutting and after cutting and my inconclusive findings are:
- While pre-folding can be more accurately done before cutting,
- a perfectly cut cube can possibly assist one to pre-fold with accuracy.
"Folding accurately" is what you think it is, and that is - folding on the lines.
Pre-Folding Over a Table's Edge
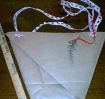
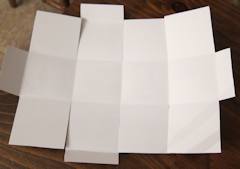
While folding all of the lines can be done by simply folding them, I found it helpful to use a straight edge of some sort. The edge could be a thin-edged ruler or as shown in the picture below, a surface with a straight, sharp edge.
 This pictures shows the cube being folded after it has been cut out. It is being folded over a table top.
When using a straight edge, line up the folding line with the edge and fold it. Turn the paper over and fold the line some more, flat if you choose. Unfold and do the same to all of the fold lines.
 Shown here is the same cube that has been pre-folded.
Cutting the Cube
Two Things:
- All photo edges that should be cut, should be cut precisely on the line.
- All tab edges that should be cut, should be cut inside the line by at least 1/16th of an inch. - This measurement does not have to be measured, it is presented to you so that you will know that the tabs should be cut so they are less wide than the cube size.
In the picture shown below, you can see the cut cube and the slivers of paper to the side. Those slivers came from trimming the tabs just a little bit. The tabs must be smaller in width and length because they will fit inside the cube, preferably without buckling from being too big.
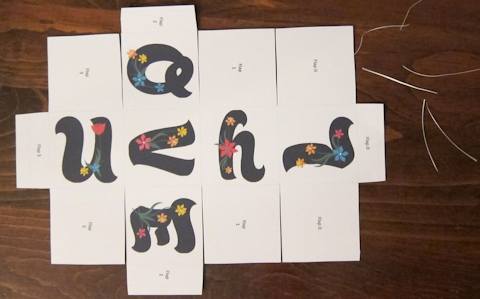
As you can see in the image above, no cut goes all the way across the paper. Cuts are made up to the middle cube intersections. The flaps that "stick out" are trimmed so that they do stick out and those flaps should also be slightly less wide than the cube's width. On the next page, Folding the Cube, you will see another example of a cut cube; it is much less perfect than this one.
A close up of the cut edges

As you do more of the cubes, you will see how much imperfection that you can get away with (to save time) without compromising the finished cube. Additionally, the flaps that are labeled as "Last Flap" may be trimmed with rounded edges - especially if you want to create a memory cube that contains a "treasure" and with the "box top" left unglued.
Next: Folding the Cube
The How-To Make the Cube Pages
- Cube Templates
- Working with the Cube Pictures - How to Add Pictures to the Cube and How to Adjust the Pictures
- Pre-folding and How to Cut the Cube You are here.
- How to Fold the Cube
PDF Cube Templates: My old cube template is listed at this page Homeschool > Games. I used to use it to make special dice for games.
Credit: This cube project was inspired by this link and a couple of friends that wanted to make the cube. There's more, but the rest is not my story to tell.
Donna Young
December 13, 2012
Other Crafts at Donna Young.org
Paper Crafts
Crafts: Ornaments
- Styrofoam Balls and Buttons Ornament
- Beaded Icicle Ornaments
- Bear-in-a-Bag Christmas Ornament
- Lollipop Tree Ornaments
- Pipe-Cleaner Candy Canes Ornament
Handcrafted Items
Educational Resources for Younger Children at DY
Calendar Related
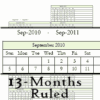
 Undated Dated Blank Calendars
Each month in this year-long calendar has the right amount of "days." Add the dates in the bordered blocks and decorate the calendar.

 On the page linked above, I added 51 new 100-number charts.
 Skeleton - in Life Science