A Memory3
 A memory cube is a project in which one places 6 photographs on a cube. The cube can be made of wood, but in the case of this particular memory cube, the cube is a piece of card stock paper that has the photos printed on it and then folded into a cube shape. The templates for this project are at Cube Templates. This page tells how to fold the cube.
How To Fold the Cube
 See Also: The Gift Michelle Made
This series of images assumes that you have already completed the following:
- Pre-folded all of the fold lines
- Cut the cube in all of the appropriate places
- Trimmed the tabs so that they are a little smaller than the cube size. This is done so that the tabs will fit inside of the cube without buckling.
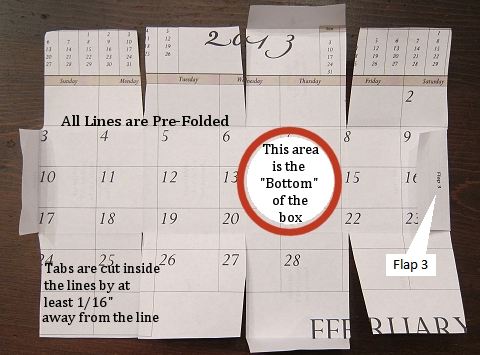
Flap 3 serves as edge support and can be glued flat. If you think that you will not need flap 3 then it may be cut off.
Dry Run- One should fold the cube without gluing for the first time to make sure that all the cuts were made and that all the folds were pre-folded. My Advice: Fold the cube "dry"; look at it; notice the places where glue might be best applied, and note any tabs that might need extra trimming. After going through the dry run once, make any adjustments and then fold and glue the cube. Optional: Leave the "box top" unglued for mementoes.
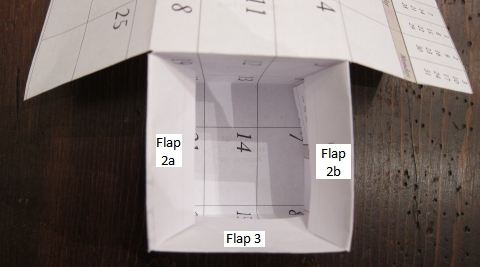
Pictured below is a cube printed on scrap paper and laid on its "back." To fold the cube, first imagine that it is a box that is laid completely open. I have marked the imaginary bottom of the box on the image below. Find that place on your printed cube - it is the point of intersection of all of the cubes. That is the "bottom" of the cube, and unless you pick up the cube, it will stay on the table during the folding process.
Bring up the sides of the "box" by making Flaps 1a and 1a meet and overlap completely. Then fold Flap 2a over what is now the top edge that was formed by Flaps 1a. This completes a side of the "box." Do the same thing to the other side with Flaps 1b and then fold Flap 2b over the top edge.
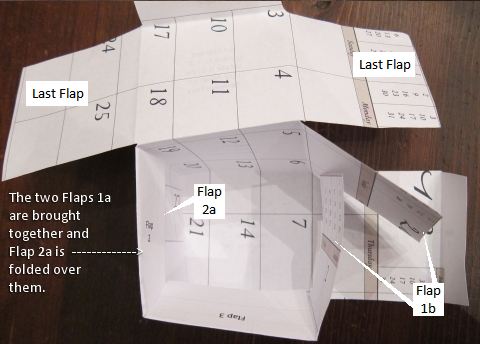
Once Flaps 1a, 2a, 1b, and 2b are in place you should see something like the image below. Your cube should resemble an "open box."
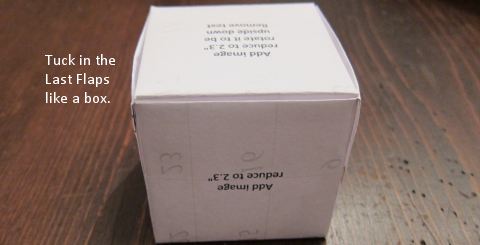
The last step in folding the cube is to tuck in the Last Flap into the top of the "box."
The How-To Make the Cube Pages
- Cube Templates
- Working with the Cube Pictures - How to Add Pictures to the Cube and How to Adjust the Pictures
- Pre-folding and How to Cut the Cube
- How to Fold the Cube You are here.
PDF Cube Templates: My old cube template is listed at this page Homeschool > Games. I used to use it to make special dice for games.
Credit: This cube project was inspired by this link and a couple of friends that wanted to make the cube. There's more, but the rest is not my story to tell.
Donna Young
December 08, 2012
Other Crafts at Donna Young.org
Paper Crafts
Crafts: Ornaments
- Styrofoam Balls and Buttons Ornament
- Beaded Icicle Ornaments
- Bear-in-a-Bag Christmas Ornament
- Lollipop Tree Ornaments
- Pipe-Cleaner Candy Canes Ornament
Handcrafted Items
Educational Resources for Younger Children at DY
Calendar Related
 Undated Dated Blank Calendars
Each month in this year-long calendar has the right amount of "days." Add the dates in the bordered blocks and decorate the calendar.

 Animations for DN Style
 Blank Calendars