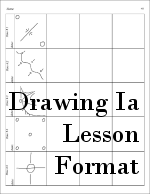
Printable Drawing Lessons - Ia
The purpose of this class is to learn to see as an artist sees and apply that skill to drawing. To be more specific, to recognize the size, shape, position/direction of lines, dots, circles, etc. in a defined space. Read more about this at the Drawing 1a home page: Purpose of Drawing Ia.
Read these comments before starting this drawing class
- Before starting this class, have the students draw a self portrait. Supply them with a recent photo or let them look at a digital photo on the computer or a print out of the photo. Keep the self portrait and photograph in a file or portfolio. After doing these lessons for 6-8 weeks, have them redraw the same photograph. Bring out the initial picture that they drew at the beginning of the class and compare the new one to the old one to see what progress has been made.
- Your student does not have to work through all of these sheets to be considered finished with this phase of drawing. You can skip through some the lessons as the student progresses. Upkeep: I had my children do a few lessons every year just to brush up on this particular drawing skill.
- Be sure to visit the Evaluated Work pages to see evaluated work and comments.
The age level of the children using the worksheets on this page is around 8 years old and up. See the link below to print worksheets designed for younger children.
Drawing 1a, 33 Lessons For Ages 9 or 10 and Older
In the lesson format I have taken the practice images from the old set (bottom of page) and placed one different image each in five rows. Each row can represent one day in which the student attempts to draw the practice image three times. Alternatively, the student could be allowed to complete as many rows as time allows or as required by your lesson plan.
Drawing Ia Files
 In this part I have 33 printable files with lessons and one blank lesson file, each file contains 5 lessons.
Instructions: Each day the student is to draw the same image 3 times. The practice exercises should not take long, depending on the student's interest, one row could take from 5 to 10 minutes. The lessons can be considered warm up exercises for other art lessons such as Drawing with Children.
Subscribe or Purchase Drawing Ia, 33 Lessons
Drawing 1a, 33 Lessons For Ages 9 or 10 and Older is included with the Basic Subscription and YoungMinds or you can purchase the Drawing Ia, 33 Lessons.
Drawing Ia's Cart Listing.
Drawing Ia, Mirror Images Files
 In this part I have 19 printable files, each with 5 lessons.
Instructions: The student is to draw a reflection of the image four times. In some lessons the first image will have traceable lines that the student may trace. The lessons can be considered warm up exercises for other classes such as Drawing with Children, or for handwriting practice.
*Mirror Blank donated by Sarah Nees
Lesson Plans
Below are text files that one can use to create lesson plans for Drawing Ia and one PDF file that has all of the drawing lessons above spread out over 35 weeks. The TEXT (TXT) files are useful to copy and paste into V Planner.
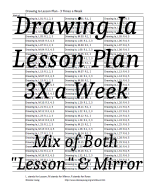 Pictured- The 3X a Week Mix - A sequence of both "Lesson" and Mirror drawing lessons spread out over 35 weeks, 3 times a week.
TEXT Files - files marked Abr is an abbreviated version of the file.
The 3X a Week Mix | The 3x a Week Mix with line breaks to represent empty days which makes this file suitable for either lesson plan column 2 or 3 in V Planner.
Drawing Ia, Lessons, one a day for 165 days | Abr.
Drawing Ia, Mirror, one a day for
95 days | Abr.
Drawing Ia MIX- Both Lessons and Mirror mixed, one a day for 266 days | Abr.
Old Format
The student has one chance to replicate the drawing in this format.
Old Format, Drawing Ia Files
I have 22 files in this part.


Old Format, Mirror Images Files
This part has seven files.


 Subscribe to DonnaYoung.org or YoungMinds
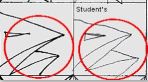 Examples of what to look for when evaluating work from Drawing 1a lessons.
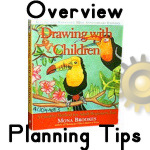 Drawing with Children
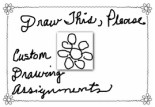 Gen - Custom Drawing Assignments - Draw This, Please