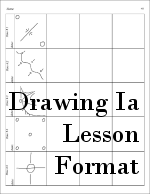
Drawing Ia Printable Lessons
Basic Purpose of these Drawing Lessons (Read more information about the purpose at The Purpose of Drawing 1a.)
To learn to see as an artist sees and apply that skill to drawing. To be more specific, to recognize the size, shape, position/direction of lines, dots, circles, etc. in a defined space.
 Drawing 1a For Ages 9 or 10 and Older
Lessons- 5x a week
33 weeks: 1a
19 weeks: mirror image
 Drawing 1a For Ages 8 or 9 and Younger
Lesson format:
1a: 9 weeks, 3x a week
Be certain to view the Drawing I~ Evaluation Samples and read the evaluation comments below.
The Purpose of Drawing 1a
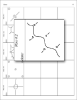
 In order to draw, one must be aware of the size, shape, and location of
the lines that make up the subject in relation to imaginary vertical and
horizontal reference lines. The boxes that are around the images in these
handouts serve as the horizontal and vertical lines. The student should be
instructed to pay attention to the location, angle, and shape of the lines
inside the boxes. It is not the image as a whole that the student should
draw, it is the lines. With practice the student should learn to see as an
artist sees.
In order to draw, one must be aware of the size, shape, and location of
the lines that make up the subject in relation to imaginary vertical and
horizontal reference lines. The boxes that are around the images in these
handouts serve as the horizontal and vertical lines. The student should be
instructed to pay attention to the location, angle, and shape of the lines
inside the boxes. It is not the image as a whole that the student should
draw, it is the lines. With practice the student should learn to see as an
artist sees.
Both of my children took these classes, one is an artist and one is not. Surprisingly the non-artist child can now draw well. Being able to draw is a minor necessity. To see what my non-artistic child is doing with his drawing skills, visit his lab book page.
How to Evaluate the Student's Work
 Because the Drawing 1a lessons are exercises, there is little
room for personal creativity, and that makes the work easy to evaluate. Basically, you
should compare the student's drawing with the original drawing and look for the following points.
Because the Drawing 1a lessons are exercises, there is little
room for personal creativity, and that makes the work easy to evaluate. Basically, you
should compare the student's drawing with the original drawing and look for the following points.
- The angle of the lines in relation to the space perimeter (The space perimeter is the box surrounding each drawing.)
- The placement of the lines within the space (This is described in more detail in the next paragraph.)
- If the dots are of similar size
- The circles are not dots
The drawings do not have to be a perfect match. If there is a dot in the middle of the square, then the child should draw a dot of similar size in the middle of the square, not on the top, the bottom or the sides of the square. You may need to reinforce this observing of space with hands-on activities if your child does not understand what he is supposed to be focusing on.
One activity that comes to mind is laying out a clock with pennies or pebbles. Make a big circle (12 inches may be big enough) in sand or draw it on a white board that is laying flat. The child should use pennies or some object to make the places of the clock or if you are using a white board the child can draw the places of the clock. The child should place a penny where 12:00 should be first, then 6:00, 3:00, and 9:00. You can move on to 1:00, 2:00, and 4:00, 5:00, and so on, if your child is old enough. I am sure that there are more activities that you can think of that will reinforce placing an item in a particular location inside of a defined space.
Important: See Samples of Evaluated Work
Related
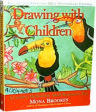
Note: The drawing lessons linked from this page can be used with the book, Drawing With
Children by Mona Brookes.
 Drawing with Children Lesson One [in Art > Books]
Drawing with Children Lesson One is about drawing. The page linked here is an overview of lesson one. The next page: Drawing With Children, Lessons for Lesson 1 has lesson plan suggestions.
 Comic Strip Templates
After using the drawing lessons, apply your drawing skills to comic strips. This page offers Printable comic strip templates.
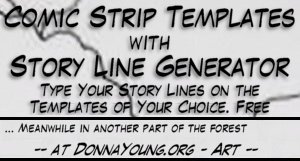 Comic Strip Templates with Story Line Generators
Or try your hand at the comic strip templates with story line generators. Type in a few action lines, print or save the resulting template and draw the action.
This page and content is made by Donna Young
Updated
 Coordinate Grid Paper