About the "Weeks"
Written: Apr 30 2009, by Donna YoungIn the Week # links in the menu above, I shared how my daughter's art class went while working through Units I and II of AOP LifePac Electives. I first wrote the "Weeks" in 2005 at a blog that I had at the time. That blog no longer exists and so I have edited the blog pages for publication at donnayoung.org. The pages are more or less a lesson plan with comments and some with pictures. Because I do not want to break any laws, they are not in great detail, but there is enough detail if you follow along with the books.
About the Pace of the "Weeks"
Point: The pace of the weeks is slower than normal for an AOP LifePac Set.
Explaination:
Although I had the entire 10-workbook set of Alpha Omega Press LifePac Electives Art, I did not intend to use all of the books in one school year. So this plan, with units one and two spread out over nine weeks, is not the pace that one would take if they intend to use all 10 books in one school year. As a student of art, I have opinions about the study of art that prevents me from rushing through the course. If I were asked how to go about the pace, I'd say to choose 4 or 5 of the units and choose parts of the art history unit and make the most of those particular books for one school year. To make each unit more meaningful, be sure that the student understands the purpose behind each unit. The purpose is usually stated in the list of objectives near the beginning of each unit.
That said, not all units will need to be spread out because extra practice of the topics presented is not necessary. Unit One is an example of a unit that can be completed in the usual amount of time with the usual amount of work. Unit One as presented in the "Weeks" is the typical AOP LifePac pace.
Another consideration is the student's interest versus need. We spent 6 weeks with Unit II (color). While 6 weeks is more time than what is usually spent on one Lifepac, we could have spent more time in Unit II, but we chose not to. My daughter had little interest in painting, but she does use color in her art, and because she works with colors, I decided that spending more time on unit 2 would benefit her. We spent just enough time to fulfill the need versus the interest.
Printable Lesson Plan files for Unit One are supplied at this page: AOP Lifepac Art Unit I Lesson Plans
Supply List for Units One and Two
Books - Linked to Christianbook.com (CBD)
- Art Lifepac 1: Concepts in Design (weeks 1, 2, 3)
- Art Lifepac 2: Principles of Color (weeks 3, 4, 5, 6, 7, 8, 9)
- Lifepac Electives: Art, Teacher's Guide You decide if you need this book or not.
- Drawing Pencils - can be purchased locally or online. We used pencils made by General Pencil Co
- Paper - More than one type of paper can be used, or not, and I will try not to make this confusing --
- - Paper for drawing - we used 32lb printing paper for this class (also used for painting) or a drawing pad
- Paper for painting - If the drawing paper is heavy enough it can be used for painting too. We used the 32lb printing paper for the painting parts of the class. The painting that is done in this course is not what one would call "frame-able"; it is more like drills, so you do not have to supply expensive paper for the painting parts of this class.
-Construction paper - 9x12 black and 12x18 white. I had this on hand and so I used it for activity 2.1 and activity 2.3.
-> And again, not to be confusing, but the painting activities can be done on construction paper. - Paint - The paint must be mixable because the whole point of some activities is mixing two colors to get one color. - Do not get craft acrylic paints that are in those little squirt jars - they mix, but poorly. Look further.
- Paint brushes - A basic paint brush set that is packaged for students will be good enough for this class.
- Paint mixing container(s) - Either buy something that is made for paint mixing or use small washable containers.
 Container for water - use to rinse brushes while working in class. Use something that has a wide footprint and a wide mouth, something like a cool whip container.
- Towel or paper towel or ? - something to wipe the brushes on after rinsing during class
- Scissors (or x-acto knife listed in the optional list below)
Materials
- Vellum - this is, or is like tracing paper - "The use of vellum for (week 1) day 3 was our choice"
- Fixative - This is a spray that "fixes" medium such as charcoal, pencil marks, etc. to paper. This item is not required - we used it on the vellum (the rubbings from one of the activities).
- X-acto knife - (Used instead of scissors in activity 2.1)
- AND a surface to use under the paper that is being cut with the x-acto knife. We used my old quilter's cutting mat.
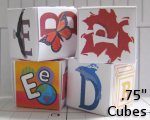 Cube Templates
 Printable Files and Quiz