Print Preview and Selecting Print Area
Check Print Preview before Printing.
What you will discover with print preview:
- How many pages it will print
- Whether what is expected to fit on one page will or not.
All of the sheets were formatted to print well, however, when a file is opened on a different computer, the formatting might not be exactly right. This is an example of what you will find:
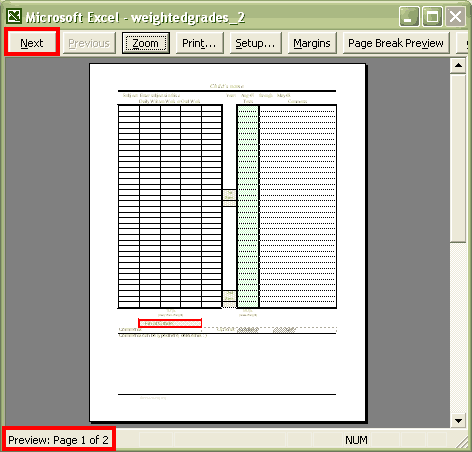
This sheet is formatted so that the grades and footer-comments will print on one sheet of paper. Notice that it will use two sheets of paper. See the bottom left corner of image.
It will use two sheets of paper because I added the current averages per column to the subject sheets and now Excel wants to print that part too.
You can force the printer to print only one sheet, by using your printer options.
Another alternative is to Set Print Area. I always go for that option.
Continued below...
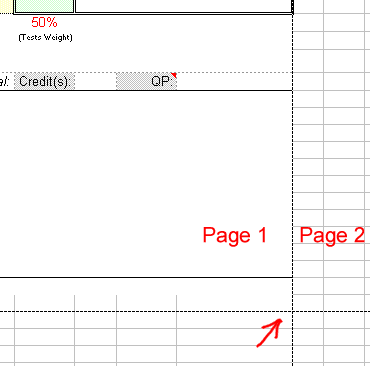
After leaving the print preview screen, you will notice that you now have dotted lines on the sheet.
These dotted lines indicate the page breaks. The page breaks show you how your printer is recognizing a page (or something like that).
To read how to force the printing of a certain area keep reading.
Continued Below....
How to set the Print Area
- Select the area that you want to print.
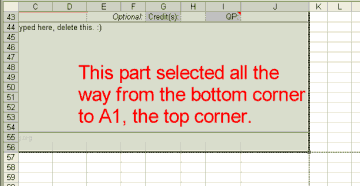
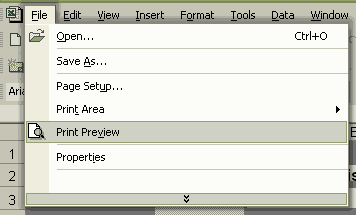
- Open from File: Print Area > Set Print Area
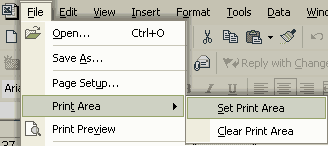
- That is all, now to check what will print, Use Print Preview again and see what you have.
Note: If after setting you the print area, it still shows that it will take more than one piece of paper, you may have to delete a row or two from the comment section. The comment section is located at rows 44-54.
Help Pages
Set Up: Quick Start Guide - Information Tab |
Subject Tabs - Adjusting the Grade Weight |
Subject Tabs - Credits |
Set up Your Grade Scale |
Enter Attendance - Calendar Tab |
How to Change the Date on the G&A Calendar |
FAQs: FAQs - Frequently Asked Questions |
I can't see the Tabs: Minimized vs Maximized |
Print Preview and Printing |
Timing and Placing the Scores |
How to Unprotect and Protect a Sheet |
Not Using the Grade Weight |
Year-Round Schooling Changes - Change number of months in school year. |
Year-Round Schooling Changes - Changing the Semester in Print
Hello Visitor!
I am currently working on this website to add to its ginormousness. Thank you for visiting, and please subscribe yearly to access my many printable files! Donna Young
May 13, 2021
 Lab Write-up
 AOP LifePac Electives Art Plan