Deciding Where to Stop
 When breaking the book into parts, you will need to consider the target audience and how many pages the audience can comfortably handle. That is one of the finer points of planning that this how-to lesson briefly discusses.
Some books are very easy to schedule because they have plenty of headings that are not spaced too far apart. This book was easy to schedule. Here's the step-by-step:
Basic Planning Sequence
1. Decide how many pages per day. This decision should be
based on the age group that will be reading the book or the
audience if you are reading aloud. The reading schedule that I
made is based on an average of 3 pages per reading.
2. Get book, ink pen, notebook paper
3. Write the first page number on the paper.
4. Count as you turn the pages, do not count pages with full
page illustrations.
5. If you decided on 3 pages per day, then count 3 pages. At
this point you may notice that there may not a clear stopping
point on the 3rd page. Keep turning the pages until you arrive
at a stopping point. This stopping point may cause the reading
to be 4, 5 or more pages long. If you think it is too long, then
go back and see if there is a stopping point on the 2nd page. If
not then decide if you want the reading for the day to be much
larger than 3 pages or decide to stop somewhere in the reading
section. I usually opt for a longer reading if it is not over 6
pages because many times there are illustrations that take up
space on the pages which reduce the actual reading.
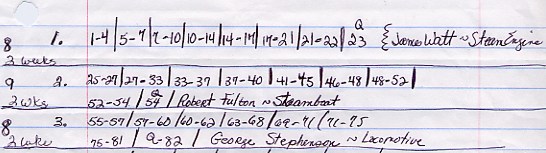
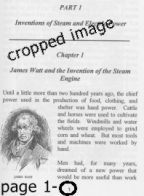
6. Write the page number of the last page for the day. In
the illustration below you can see that I write mine like this:
1-4 <- That means to read pages 1, 2, 3, and 4 or some of 4.
Draw a vertical line | (see in the illustration below.) Then
continue counting pages as you turn them, writing the page
numbers for the daily readings.
7. Write the questions on a separate day. In the
illustration below the questions are marked with a Q.
Deciding the Stopping Places
The first block of reading is from page 1 to page 4. That was easy because page 5 has a heading near the top of the page.
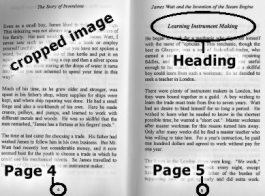
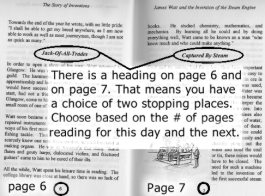
The next block of reading is from page 5 to page 7.
I had a choice of two stopping places because both pages 6 and 7 have a heading. I decided to stop at page 7 so that the reading would be at least 2 pages long and because the next heading is on page 10. If I had decided to make the daily readings 5 pages long, then stopping at 10 would have been my choice; however, in this reading schedule I have tried to keep the readings at an average of 3 pages long each.
Once you have all of the page groups written down. Go back and count how many readings are in each chapter. Write the number in the left hand margin of the paper. You can see in the illustration where I did this. The number 8 for chapter 1, 9 for chapter 2, and 8 for chapter 3. After that decide how many weeks to spend on each chapter. In this schedule most chapters fit nicely into 2 weeks apiece. At this point you are almost done! :-) The next step is writing this neatly on a planner and placing it in your notebook. This is time that I turn use my computer and type the reading schedule in a word processing program, print it and place it in my notebook. I always save a copy in a safe place for the next child that will use the book. if you want to use one of my planners, then I would recommend that you use either a quarter planner or a semester planner for this type of schedule.


 Blank Calendars
 Drawing Assignments
 Unlock A Cell Sometimes